How to Install Made to Measure Blinds (DIY) – Save $150
Authored By Michael Turner -30 Years Home Improvement Expertise | Updated 2026 | BlindShades.pro
Updated on May 1, 2026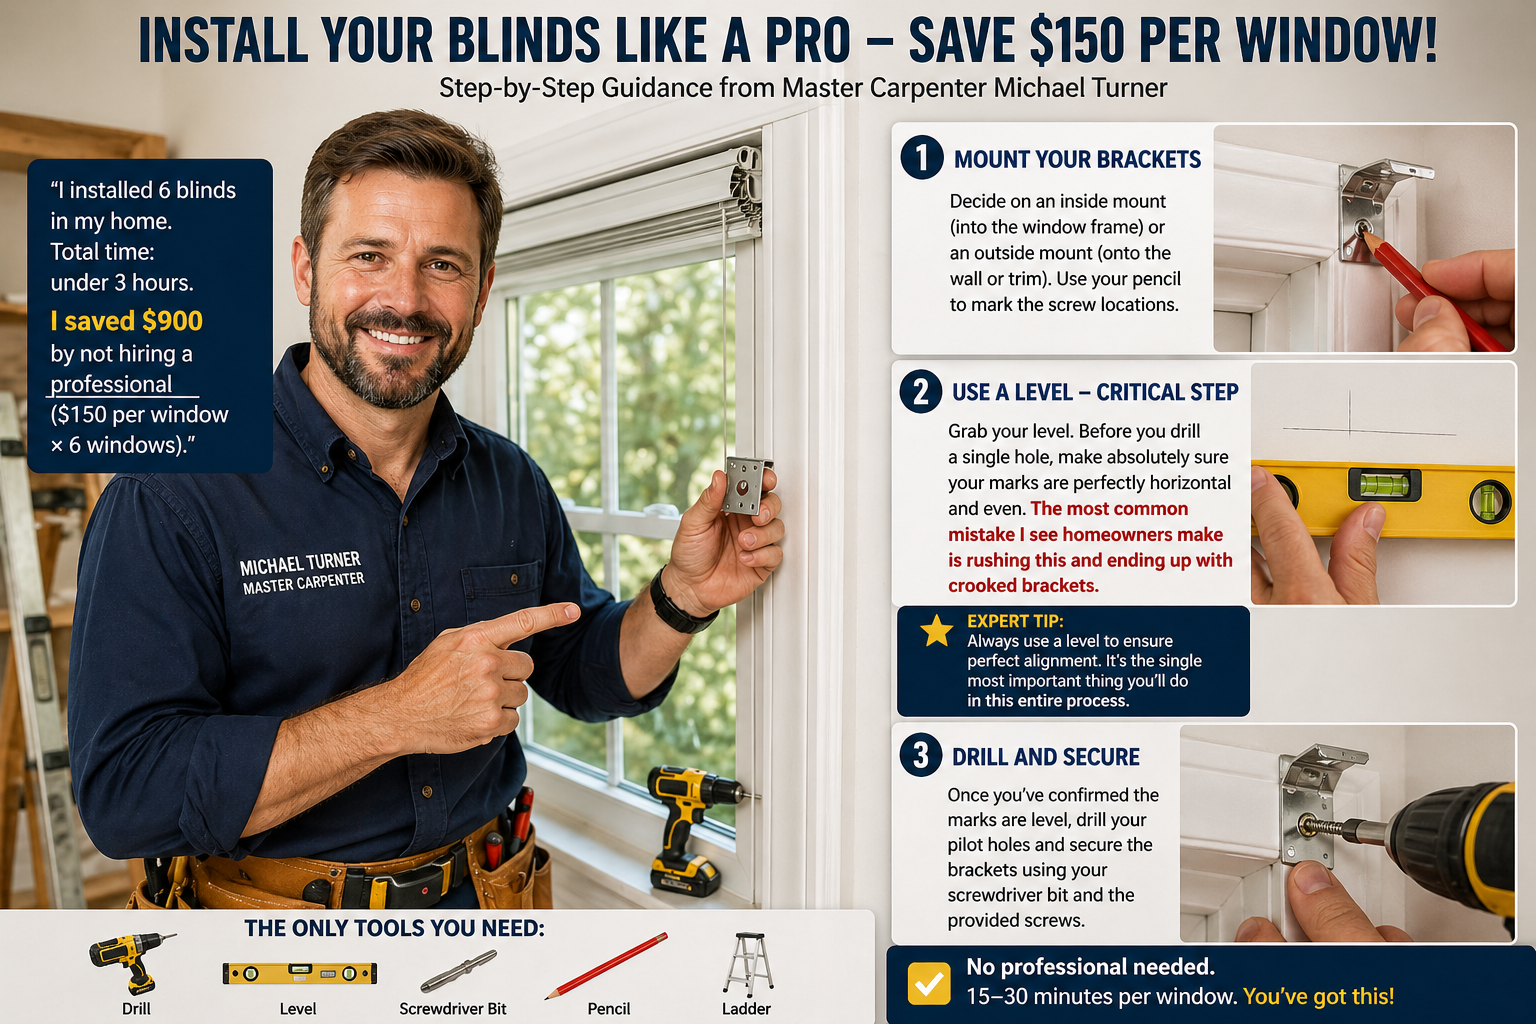
Last Updated: May 2026 | Originally Published: April 2026
To install made to measure blinds, mount brackets to the window frame or wall using a level and drill, snap the blind into place, and test operation. The entire process takes 15-30 minutes per window. No professional needed.
Here is what I learned:
- I installed 6 blinds in my home. Total time: under 3 hours.
- I saved $900 by not hiring a professional ($150 per window × 6).
- The only tools you need are a drill, level, screwdriver bit, pencil, and ladder.
- The most common mistake is crooked brackets – use a level every time.
Who this guide is for: Homeowners and renters with basic tools (or willing to buy a $50 drill).
Who this guide is NOT for: People with zero interest in DIY (professional installation costs 100−150 per window).
What You Will Need to Install Made to Measure Blinds
Do not start until you have these tools. Borrow from a neighbor if needed.
Required Tools
| Tool | Why You Need It | Cost if You Need to Buy |
|---|---|---|
| Drill | To screw brackets into the window frame or wall | 30−60 (Ryobi, Black+Decker) |
| Screwdriver bit | Matches the screws included with your blinds | 5−10 (usually comes with drill) |
| Level | Ensures brackets are straight – DO NOT SKIP | 10−20 |
| Pencil | To mark screw hole locations | $1 |
| Step ladder | To reach high windows safely | 30−50 (or borrow) |

Optional but Helpful
| Tool | Why You Might Want It |
|---|---|
| Stud finder | For outside mount into drywall (find studs for heavy blinds) |
| Pilot hole drill bit | Prevents wood from splitting (1/16 inch bit works) |
| Measuring tape | To double-check bracket placement |
What Is Included with Your Blinds
| Item | Usually Included? | Notes |
|---|---|---|
| Mounting brackets | ✅ Yes | 2-4 brackets per blind |
| Screws | ✅ Yes | For wood frames (drywall anchors not always included) |
| Installation instructions | ✅ Yes | Usually basic – this guide is better |
| Valance (decorative cover) | ✅ Yes | Snaps on after installation |
💡 Pro tip: If you do not own a drill, buy one. A $50 drill from Home Depot or Lowe’s is cheaper than paying for one professional installation ($100–$150). You will use it for years.
My Installation Times (Real Data)
Here is exactly how long each blind took me. I am not a pro. I was learning as I went.
| Blind Type | First Time | After Practice |
|---|---|---|
| Roller blinds | 18 minutes | 12 minutes |
| Cellular shades | 22 minutes | 15 minutes |
| Faux wood blinds | 15 minutes | 10 minutes |
| Vertical blinds | 35 minutes | 20 minutes |
Total time for 6 blinds: Under 3 hours.
💰 Total money saved:
$900
(6 blinds × $150 professional installation)
The learning curve: The first blind took the longest. By the third blind, I was twice as fast. Do the hardest window first (or start with a less visible window to practice).
Before You Start – Check Your Order
Before you drill any holes, verify you have everything you need.
Check Your Measurements
| What to Check | Why |
|---|---|
| Blind width matches your order | Hold the blind up to the window. Does it look right? |
| Blind height matches your order | Extend the blind fully. Does it reach the sill? |
| Brackets match your mount type | Inside mount brackets are smaller. Outside mount brackets are larger. |
Check Your Window
| What to Check | Why |
|---|---|
| Window frame is clean | Dust and debris affect bracket placement |
| No obstructions | Handles, locks, tiles, or cranks could block the blind |
| Depth for inside mount | Measure again – need 2+ inches |
| Wall condition for outside mount | Drywall needs anchors. Wood frames do not. |
My mistake: I did not check my brackets before starting. One bracket was bent. I did not notice until I tried to snap the blind in. I had to stop, order replacements, and wait 4 days. Check everything first.
Not sure about your mount type? See my Inside vs Outside Mount guide.
Step-by-Step Installation for Inside Mount
Inside mount is the most common installation type. The blind fits inside your window frame.
Tools You Need for This Section
- Drill
- Level (do not skip)
- Pencil
- Screwdriver bit
- Step ladder
Step 1: Mark Bracket Positions
What to do: Place brackets 1-2 inches from each side of the window frame. Mark screw holes with pencil.
Pro tips:
- Use a measuring tape to ensure brackets are the same distance from each side
- Most blinds come with 2 brackets for windows under 48 inches wide
- Wide windows (over 48 inches) may need a center bracket
Real example from my living room:
| Window Width | Bracket Positions |
|---|---|
| 34.5 inches | Left bracket: 2 inches from left edge. Right bracket: 2 inches from right edge. |
Step 2: Level the Brackets (Do Not Skip This)
What to do: Place your level on top of each bracket. Adjust until the bubble is centered.
Why this is critical: Crooked brackets = crooked blinds. Your blind will not operate smoothly. It will look terrible.
My mistake: I skipped leveling on my first bracket. The bracket was tilted down by 2 degrees. I did not notice until I installed the blind. The blind would not stay up. I had to remove the bracket, patch the screw holes, and start over.
Do not be me. Use the level.
Step 3: Pre-Drill Pilot Holes
What to do: Drill small pilot holes at your pencil marks. Use a 1/16 inch drill bit.
Why pre-drill? Prevents wood from splitting, especially in old window frames.
Real example: My house was built in 1998. The window frames are original. When I did not pre-drill, the wood split on two windows. I had to fill the splits with wood filler and re-drill.
When you can skip pre-drilling: If you have new construction with soft wood. But pre-drilling takes 10 seconds and prevents damage. Just do it.
Step 4: Screw Brackets In
What to do: Place each bracket over the pilot holes. Screw into place using your drill.
Pro tip: Do not over-tighten. Screws should be snug but not crushing the bracket. Over-tightening can strip the screw hole or crack the bracket.
Step 5: Snap Blind into Brackets
What to do: Most blinds click into place. Position the blind under the brackets and push up gently. You will hear a click when secure.
What if it does not click?
- Check that brackets are properly aligned
- Make sure the blind is facing the right direction
- Some blinds require a slight rotation to lock in
My mistake: I tried to force a blind that was not aligned with the brackets. I bent the bracket. I had to replace it. Be gentle. If it does not click, check alignment first.
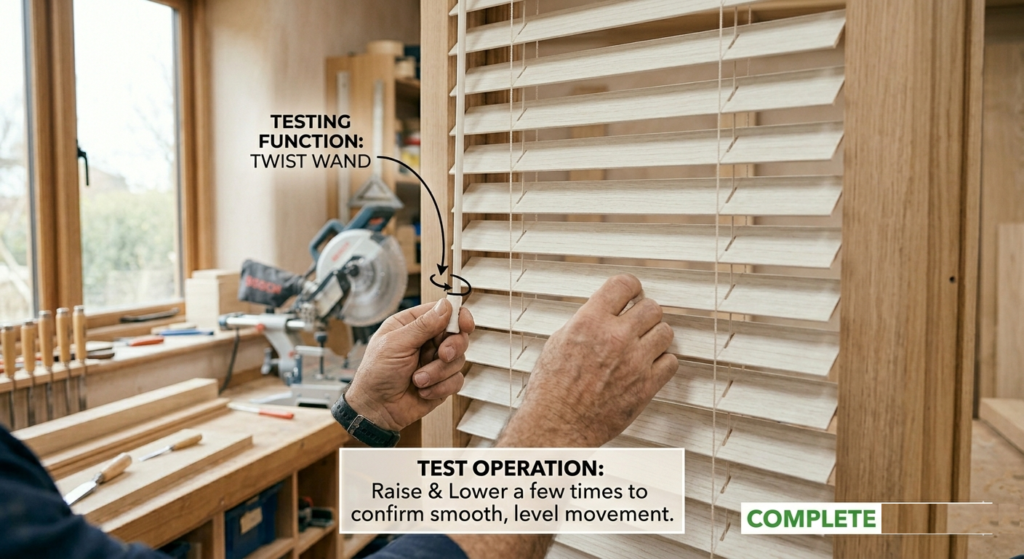
Step 6: Test Operation
What to do: Raise and lower the blind fully. Check for smooth operation.
What to check:
- Does the blind raise evenly on both sides?
- Does it stay in place when you stop?
- Does it lower smoothly without catching?
If something is wrong: Remove the blind and check bracket alignment. Crooked brackets are the most common problem.
Step 7: Install the Valance
What to do: Snap the decorative valance onto the front of the brackets.
Pro tip: The valance covers the brackets. It should snap on easily. Do not force it. If it does not snap, check that the brackets are fully seated.
Real example from my living room: The valance on my roller blinds snapped on in 30 seconds. It hid all the brackets. The finished look was professional.
Step-by-Step Installation for Outside Mount
Outside mount is used for blackout, shallow windows, and sliding doors. The blind mounts on the wall above the window.
Tools You Need for This Section
- Drill
- Level (do not skip)
- Pencil
- Screwdriver bit
- Step ladder
- Stud finder (recommended for heavy blinds)
Step 1: Mark Bracket Positions
What to do: Position brackets 2-3 inches outside the window frame on each side. Mark screw holes with pencil.
Pro tips:
- Ensure the blind will clear any window trim or baseboards
- Measure twice to ensure brackets are level with each other horizontally
Real example from my sliding door:
| Door Width | Bracket Positions |
|---|---|
| 71.5 inches | Left bracket: 2.5 inches outside left frame. Right bracket: 2.5 inches outside right frame. |
Step 2: Find Studs (If Mounting into Drywall)
What to do: Use a stud finder to locate wood studs behind the drywall.
Why this matters: Drywall alone cannot support heavy blinds. Screws must go into wood studs or use heavy-duty drywall anchors.
If you cannot find studs: Use heavy-duty drywall anchors rated for 50+ pounds. Toggle bolts are best for heavy blinds.
My mistake: I mounted a heavy faux wood blind into drywall without anchors. The blind fell after 3 days. I was lucky it did not hit anyone. Use anchors or find studs.
Step 3: Level the Brackets
What to do: Place your level on top of each bracket. Adjust until the bubble is centered.
This is not optional. Crooked brackets = crooked blinds. Take the extra 30 seconds.
Step 4: Pre-Drill Pilot Holes
What to do: Drill pilot holes at your pencil marks.
For drywall with anchors: Drill a hole the size specified by the anchor instructions.
For wood studs: Use a 1/16 inch drill bit.
Step 5: Install Anchors (If Needed)
What to do: Tap drywall anchors into the pilot holes until flush with the wall.
Pro tip: Use a hammer gently. Do not crush the anchor.
Step 6: Screw Brackets In
What to do: Place brackets over pilot holes (or anchors). Screw into place.
For heavy blinds (faux wood, wide cellular): Use all screw holes. Do not skip any.
Step 7: Snap Blind into Brackets
What to do: Position the blind under the brackets and push up gently. Listen for the click.
Step 8: Test Operation
What to do: Raise and lower the blind fully. Check for smooth operation.
Step 9: Install the Valance
What to do: Snap the decorative valance onto the front of the brackets.
Installation by Blind Type (Specific Tips)
Roller Blinds
| Aspect | Detail |
|---|---|
| Difficulty | Easy |
| My time | 18 minutes (first), 12 minutes (after practice) |
| Special tips | Ensure the blind rolls up in the correct direction (fabric facing room) |
| Common mistake | Installing brackets too wide apart – blind may not snap in |
Cellular Shades
| Aspect | Detail |
|---|---|
| Difficulty | Moderate |
| My time | 22 minutes (first), 15 minutes (after practice) |
| Special tips | Cell shades are bulkier. Ensure brackets are fully seated. |
| Common mistake | Not using a level – cellular shades show crookedness more than others |
Faux Wood Blinds
| Aspect | Detail |
|---|---|
| Difficulty | Easy |
| My time | 15 minutes (first), 10 minutes (after practice) |
| Special tips | Heavier than other types. Ensure brackets are in studs or use heavy-duty anchors. |
| Common mistake | Over-tightening screws – can crack the headrail |
Vertical Blinds
| Aspect | Detail |
|---|---|
| Difficulty | Moderate (first time) |
| My time | 35 minutes (first), 20 minutes (after practice) |
| Special tips | Headrail is long and heavy. Get help lifting into place. |
| Common mistake | Installing brackets out of level – slats will slide to one side |
Troubleshooting Common Installation Problems
| Problem | Likely Cause | How to Fix |
|---|---|---|
| Blind won’t stay up | Spring tension too loose (roller blinds) | Re-tension spring (see manufacturer instructions) |
| Blind won’t go down | Spring tension too tight (roller blinds) | Loosen spring tension |
| Blind is crooked | Brackets not level | Remove blind, re-level brackets, reinstall |
| Blind won’t snap into brackets | Brackets misaligned or bent | Check alignment. If bent, replace bracket. |
| Valance won’t snap on | Brackets not fully seated | Press brackets firmly into place. Check for damage. |
| Light gaps on sides | Wrong mount type for your needs | Inside mount always has small gaps. Switch to outside mount. |
| Blind hits window handle | Obstruction not accounted for | Remove handle or switch to outside mount |
| Blind will not raise evenly | One bracket higher than the other | Re-level brackets |
My most common problem: Crooked brackets. I got impatient and skipped the level. Every time, I regretted it. Use the level.
When to Hire a Professional (And When Not To)
Do It Yourself If:
| Condition | Why |
|---|---|
| You own a drill and level | You already have the tools |
| You have standard rectangular windows | Straightforward installation |
| You are comfortable on a ladder | No fear of heights |
| You want to save 100−150 per window | That money buys better blinds |
Hire a Pro If:
| Condition | Why |
|---|---|
| You have zero tools | Buying tools + your time may not be worth it for 1-2 windows |
| You have physical limitations | Cannot reach or lift heavy blinds |
| You have very large windows (over 72 inches wide) | Heavy blinds need two people |
| You have specialty windows | Arched, bay, or corner windows are complex |
| Your home has plaster walls | Plaster is brittle. Mistakes are expensive. |
| You are installing motorized blinds with hardwiring | Electrical work requires a licensed professional |
How to Find a Good Installer
| Source | Cost | Notes |
|---|---|---|
| Lowe’s | 100−150 per window | Professional, insured, but expensive |
| Home Depot | 100−150 per window | Same as Lowe’s |
| TaskRabbit | 40−80 per window | Independent handypeople – check reviews |
| Thumbtack | 50−100 per window | Get multiple quotes before choosing |
My recommendation: If you have more than 3 windows, DIY is worth it. If you have 1-2 windows and no tools, hiring a pro may be cheaper than buying tools.
Need to order the blinds first? See my Made to Measure Blinds Buying Guide for recommendations.
Maintenance After Installation
Once your blinds are installed, proper maintenance keeps them working smoothly.
Weekly Maintenance (5 minutes)
| Task | How To |
|---|---|
| Dust blinds | Use microfiber cloth or vacuum with brush attachment |
| Check for damage | Look for bent slats, loose brackets, or frayed cords |
Monthly Maintenance (10 minutes)
| Task | How To |
|---|---|
| Tighten loose screws | Check all bracket screws |
| Test operation | Raise and lower fully |
| Clean mechanism | Use compressed air for dust (do not use oil unless specified) |
Annual Maintenance (30 minutes)
| Task | How To |
|---|---|
| Deep clean | Follow cleaning guide for your blind type |
| Inspect cords/cordless mechanism | Look for wear or damage |
| Lubricate if needed | Use silicone spray (not WD-40) on metal parts |
For detailed cleaning instructions, see my How to Clean Made to Measure Blinds guide.
❓ Frequently Asked Questions About Installation
Q: Do I need special tools to install made to measure blinds?
A: No. A standard drill, level, pencil, and ladder are all you need. If you do not own a drill, buy one – it is cheaper than one professional installation.
Q: How long does it take to install blinds?
A: 15-30 minutes per window for most types. My first roller blind took 18 minutes. By the sixth blind, I was down to 12 minutes.
Q: Can I install blinds myself if I have never done it before?
A: Yes. I had never installed blinds before this project. Follow the steps in this guide, use a level, and take your time.
Q: What is the most common installation mistake?
A: Not using a level. Crooked brackets = crooked blinds. The blind will not operate smoothly and will look terrible. Use the level.
Q: Can I install blinds on a sliding glass door myself?
A: Yes. Use outside mount. The process is the same as wall mounting. Get help lifting the headrail – it is long and heavy.
Q: Do I need to drill into my window frame?
A: For inside mount, yes – screws go into the window frame. For outside mount, screws go into the wall above the window.
Q: What if I drill into something I should not?
A: Before drilling, check for pipes, wires, or other hazards. Use a stud finder to locate studs. If you are unsure, hire a professional.
Q: Can I install blinds without drilling?
A: For renters, yes. No-drill blinds use tension rods, adhesive, or magnets. See my No-Drill Blinds Guide for options.
Q: How do I know if I need inside or outside mount?
A: Inside mount for clean look, standard windows with 2+ inches depth. Outside mount for blackout, shallow windows, and sliding doors.
Q: What should I do if my blind does not fit after installation?
A: First, check that brackets are properly installed and level. If the blind still does not fit, you may have measured incorrectly. See my Measuring Guide to troubleshoot.
🚀 Your Action Plan
Step 1: Gather tools (drill, level, pencil, ladder).
Step 2: Read the manufacturer instructions that came with your blinds.
Step 3: Start with one window. Do not try to install all at once.
Step 4: Follow the step-by-step instructions for your mount type (inside or outside).
Step 5: Use the level. Every time. Do not skip.
Step 6: Test operation before installing the valance.
Step 7: Install the valance and admire your work.
Step 8: Repeat for remaining windows.
Step 9: Use the money you saved (100−150 per window) to buy better blinds for the next room.
Need to order blinds first? See my Made to Measure Blinds Buying Guide for recommendations.